Feeds:
Posts
Comments

Archive for August, 2009

PYO not BYO…..

A lovely bank holiday Monday here in London – perhaps the end of the summer weather (well according to the forecasters!) but fingers crossed there is still some lovely late summer days ahead.

Not a cloud in the sky!

Not a cloud in the sky!

IMG_0467

Anyway, it was a perfect day to head to a Pick Your Own farm and stock up on seasonal fruit and veg. We decided to try somewhere a bit closer to home today (Stanhill Farm) and we hadn’t realised quite how close to home – only about 15 mins as opposed to the usual hour. Typical that we discover this at the end of the season! We also found that it is opposite the golf course James has been frequenting – so also typical that it took a google search to discover it!!

Ripe and ready for picking were raspberries, strawberries, sweetcorn and runner beans. So we came home loaded up! It always makes me wonder why I continue to go to the supermarket when I can go to the farm for less than half the price – 5 ears of corn for 1 pound.

Raspberries!

Raspberries!

IMG_0457

Chilling in the Strawberry Patch

Chilling in the Strawberry Patch

Runner Beans

Runner Beans

Sweetcorn!

Sweetcorn!

Despite my best efforts I could not stop Izzy from picking and eating! Who can blame her? If you can’t beat them, join them!! Fresh picked strawberries warm from the sun – the taste of summer – BLISS!

The sweetcorn formed part of tonight’s dinner and I have to say, at the risk of offending James since he grew some last year, that it was the best I had ever had. Wrapped in tinfoil and cooked on the BBQ. Simple and amazing! Luckily we still have about 10 ears to get through in the next week or so. I am planning on tackling a sweetcorn and red pepper relish one night this week – let’s see if that eventuates!

As it is back to the work and nursery routine tomorrow I baked another batch of cookies, with Izzy’s help of course, to add to the tin for the nursery ladies. Looks like I have managed a 50% success rate since today’s effort improved on yesterday’s but definitely room for improvement.

Choccy Melts (courtesy of Cookie Magic – Kate Shirazi)

Ingredients:-

125g butter, softened

50g icing sugar, sifted

50g cornflour

25g cocoa powder

100g plain flour

100g dark or milk chocolate

Preheat oven to 190C.

Beat the butter in a large bowl until very soft, then simply add all the other ingredients other than the 100g of chocolate. Mix together until it forms a dough.

Take small bowls of the dough and flatten them slightly until you are happy with the size and shape. Place them on your lined baking sheet and bake for 10-12 minutes. Leave the biscuits to cool on the baking sheets. (I actually moved mine onto a cooling rack lined with baking paper)

Break the chocolate up into little pieces and melt in a heatproof bowl set over a pan of simmering water. When the chocolate has melted, use a spoon to drizzle it all over the biscuits and then leave to set.

Choccy Melts

Choccy Melts

Read Full Post »

Made in Morocco

Today has been a great day in the kitchen. I love Moroccan food – something about the spices, the combination of sweet and savoury and the delicious ingredients. James and I first went to Morocco in 1999 in order to avoid the whole millenium hoo-ha. We spent 2 weeks on a tour starting in Casablanca and ending in Marrakech. What an amazing country! At the time James and I were not particularly ‘foodie’ orientated but memories of the food on that trip lingered. Although there is a small confession to be made here…….by the time we hit Marrakech we were all a bit ‘couscous and tagined out’ (I don’t think that would happen these days!) and a group of us jumped in a cab and shouted those words that need no translation …..’McDONALDS!’. It’s a shameful thing to admit!!!

We returned to Marrakech in 2006, along with Amy & Daz and Mum, to celebrate the big 3-0!! and this time we were far more appreciative of the food on offer. A trip to Marrakech would never be complete without a dinner in the Djemaa El Fna (which is the square & market place in Marrakech’s medina quarter) – it’s a crazy place and walking around is an experience and a half. Everyone wants your business. You either love it or hate it, but regardless it is an assault on all your senses and there is a dazzling array on offer. For the more adventurous visitors (and many locals!) there are cooked goats heads ready to be split open for the brains inside (sorry, am just not brave enough for this!), and then there are delicious juicy kebabs and succulent meat everywhere you look, served with breads and salads. It’s a must do culinary experience! During the day it is full of carts selling fresh dates, figs, pistachios, almonds..and then there are the orange juice carts. We ended up visiting the same vendor every day and savoured our glass of OJ which helped kick start another day in the souks.

Marrakech is also full of top class restaurants and after a bit of research we booked Dar Moha for my 30th dinner. It has the most beautiful setting around a candlelight pool – just perfect for a light balmy evening. The food is a step away from the traditional Moroccan fare and has a modern twist – delicate and delicious.

So, hopefully from the above you can tell that I enjoy some Moroccan grub!! As I had some time this afternoon I decided it was time to crack out the tagine pot. Perusing the cookbook shelf I pulled out Julie LeClerc’s (fellow Kiwi) Made in Morocco and started thumbing through.

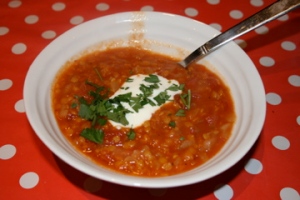
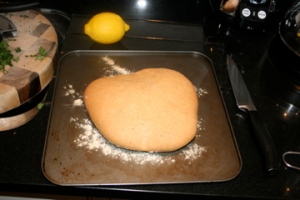
After having a bit of a clear out in the cupboards this week I found we have about 3 bags of red lentils and so decided to make the quick Spiced Split Lentil Soup. James then jumped in and decided that bread was required and so he quickly knocked up Barley Bread to accompany.

The soup as so simple and although there is a consider amount of spice required in the Simple Moroccan Spice I did cheat and use the mixed Moroccan spice that I picked up in the souk in Marrakech. Considering the length of time I have had it we were not surprised to learn it may have lost some of its strength and pungency and unfortunately this meant that the soup was nutritious and filling but a bit bland. Next time I will make up a batch of JLC’s Simple Moroccan Spice and ditch my authentic but out of date spice blend! Not a great choice for Izzy though as she has proved to be averse to onions and tomatoes. We keep trying although the gag reflex kicks in even when we sneak it onto the spoon unnoticed!

Spiced Split Lentil Soup (courtesy of Made in Morocco – Julie LeClerc)

Ingredients:-

3 Tbsp olive oil

2 onions, finely diced

2 Tbsp Simple Moroccan Spice blend (recipe to follow)

2 x 400g cans choppped tomatoes

2 cups chicken stock (or substitute vegetable stock for a vegetarian version)

1 cup split red lentils

sea salt & freshly ground black pepper

1/4 cup chopped fresh parsley or coriander

Heat a large saucepan, add oil and cook onions for 3-4 minutes to soften but not colour. Add spice blend and cook for 1 minute to release essential spice flavours.

Add tomatoes, stock or water and red lentils and bring to the boil, then simmer for 15 minutes, stirring regularly. Add more water if the mixture becomes too thick. Season with salt and pepper to taste and serve sprinkled with chopped parsley or coriander as preferred.

Simple Moroccan Spice blend

2 tsp each of ground cumin, coriander, paprika, ginger and cinnamon.

1 tsp each of white pepper and turmeric

14 tsp each of chilli powder and ground nutmeg

Combine all spices and store in a sealed jar.
IMG_5777

Barley Bread (also courtesy of Made in Morocco – Julie LeClerc)

Ingredients:-

1/2 cup warm water

3 teaspoons active dried yeast

1 teaspoon sugar

2 1/2 cups whole wheat flour (or barley flour if available)

1 cup strong flour

1 tsp sea salt

2 Tbsp olive oil

1 cup tepid water

extra flour for kneading

Place warm water in a small bowl and sprinkle with yeast and then sugar. Set aside in a warm place to activate for 5-10 minutes (when activated the mixture will be frothy).

Place the flours and salt in a large bowl and make a well in the centre. Pour in the frothy yeast mixture, oil and tepid water and mix to form a firm dough. Turn dough out on a lightly floured work surface and knead for 10 minutes until smooth and elastic.

Divide dough into two and shape each portion into a large flat disc. place on a lightly floured oven tray and cover with a clean cloth. Leave in a warm place to rise for 1 hour or until when dimpled with a fingerprint the dough returns to its former shape.

Preheat oven to 200C. Bake for 15 mins or until golden brown. Remove to a wire rack to cool.
IMG_5774

Onto the main course……..

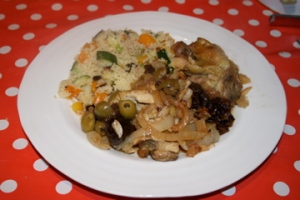
Tagine of Chicken with Prunes & Almonds (courtesy again of Made in Morocco – Julie LeClerc)

Ingredients:-

1.4kg free-range chicken, cut into 8 portions (I used about 1.1kg of chicken thighs and drumsticks)

2 onions, tickly sliced

2 cloves garlic, peeled and crusshed

1 tsp each of ground cinnamon and ground ginger

1 cup pitted prunes

1 cup green olives

1/2 cup blanched almonds

1/4 cup white wine viegar

1 1/2 cups chicken stock

sea salt & freshly ground black pepper

1/4 cup chopped fresh parsley

Place chicken portions in a tagine or large casserole. Scatter over remaining ingredients in the order listed, except the parsley, and season with salt & pepper.

Cover the pan and bring the liquid to the boil, then turn down the heat to simmer for 1 1/2 hours, turning the chicken pieces once or twice, until the chicken tests cooked and the liquid is much reduced, The cooking can alternatively be done in an oven heated to 180C.

Adjust seasoning of sauce if necessary before serving. Serve scattered with parsley.

So very easy!! The only problem I encountered was that my tagine pot was a bit small and I ended with chicken stock flooding my stove top! Oh well, it’s only a bit of mess!

The perfect accompaniment to tagine must be couscous – a perfect partnership. My couscous has always been a little hit and miss – sometimes fluffy and light and other times stodgy and lumpy. Tonight I took my time, googled it, checked recipes and think I finally came up with a, hopefully consistent, method.

Couscous should be prepared with 1 1/2 cups of water or chickenstock (or a combination) to 1 cup of couscous. Heat up  saucepan and melt a small knob of butter and then lightly stir in some chopped spring onions. After a minute or two I added the stock/water. Once it is almost boiling take it off the heat and pur into the bowl of couscous. Then cover with cling film (or glad wrap as we Kiwi’s call it) and leave to steam for about 10 mins. We had a couple of peppers and courgettes in the vege bin and so James grilled these on the BBQ and then chopped into small pieces while I toasted a handful of pine nuts. When the couscous has steamed then add some lemon juice and a small glug of extra virgin olive oil before fluffing up with a fork. I then added in the chopped veg and pine nuts and gave it a good stir.

Serve alongside the tagine.
IMG_5778

Overall, I think we can call tonight’s dinner a success! Even a partial success for Izzy – she devoured the chicken and couscous once the peppers and courgettes had been removed. Although I did bribe her to try a courgette so it’s a start. The prunes were a no go even with bribery on the table and trying to sell them as a big sultana once they had been cut up didn’t help. Olives are never a problem though – Izzy is mad for them!

Read Full Post »

Well it all started well!! Izzy and I got up this morning and decided to indulge in a little baking. We have been meaning to bake a tin full of cookies to take over to all the lovely ladies at nursery so this morning seems like a good time to get started!

I still have a cupboard full of flour, sugar, butter etc from recent baking so it’s time to use it up! Plus Amy gave me a really cute wee book called Cookie Magic for my birthday that is full of scrumptious recipes.

We started off with Choc Chip Shortbread and Izzy was a great help kneading in the choc chips……and picking them out to sneakily pop them in her mouth……cheeky girl!

Kneading the shortbread dough............

Kneading the shortbread dough............

........and picking out the choc chips!

........and picking out the choc chips!

Chocolate Chip Shortbread (courtesy of Cookie Magic – Kate Shirazi)

Ingredients:-

250g butter, shortened

50g caster sugar

250g plain flour

125g cornflour

50g chunky chocolate chips

Preheat the oven to 170C.

Cream the butter & sugar together in a large bowl until pale and fluffy. Sift the flour & cornflour on to the butter mixture and mix until you have a lovely smooth dough. Sprinkle the chocolate chips over the dough and knead in until the chocolate is evenly distributed.

Roll out a sheet of cling film, tip the dough onto it, then form the dough into a fat sausage and wrap up tightly. Leave to chill in the refrigerator for at least an hour.

Remove the roll of dough from it’s cling film and slice into rounds. Place the rounds on your lined baking sheets and bake for about 30 minutes untl they are pale golden. Leave the shortbread to cool on wire racks.

Have been pretty pleased with how these turned out – buttery and crumbly – got to be a good sign!

IMG_5764

Next on the agenda were Ginger biscuits – not such a success – even after 2 attempts!! I think I heaped the teaspoons of ginger and the tablespoons of golden syrup a little too much and then combined with being a teeny weeny bit burnt the first attempt was a flop. Only option? try again! However second time around wasn’t much better as this time they were too crumbly and did not cook well. Will have to work on this one before sharing the recipe.

Onto, Anzac biscuits (a kiwi favourite) and I really liked the way they turned out but they didn’t spread as I would have expected. The taste test proved otherwise – a bit bland and floury. Revisiting the recipe I could see why – gggrrrr I forgot to add the sugar!!! What an amateur!! I am going to share this recipe as apart from my own stupidity I think it would have been perfect! Won’t be making another batch today but will try again one day soon – MUST READ RECIPE PROPERLY!!!!

Anzac Biscuits (courtesy of Cookie Magic – Kate Shirazi)

Ingredients:-

100g r0lled oats

150g plain flour

100g soft light brown sugar

50g desiccated cocnut

115g butter

2 Tbsp golden syrup

1 Tbsp hot water

1/2 tsp baking soda

Preheat the oven to 190C.

Mix the oats, flour, sugar (don’t forget the sugar!!) and coconut in a large bowl. Heat the butter and golden syrup gently until the butter has melted.

In another the bowl, mix the hot water and baking soda together and add the mixture to the pan of butter and golden syrup. Watch out for forth-central, then tip the whole lot on top of the oat mixture and stir away. Plop dessertspoonfuls (this didn’t work for me and I rolled into balls and pressed down) of the mixture onto your baking sheets, allowing a little space between them as they spread and flatten slightly. Bake for about 10 minutes until golden.

Let the biscuits cool and set on the baking sheets for a few minutes before lifting them onto wire racks to cool completely.

Look good, taste rubbish!

Look good, taste rubbish!

Just for interest I have copied some history regarding the Anzac biscuit from http://www.anzacday.org.au………..

During World War 1, the wives, mothers and girlfriends of the Australian soldiers were concerned for the nutritional value of the food being supplied to their men. Here was a problem. Any food they sent to the fighting men had to be carried in the ships of the Merchant Navy. Most of these were lucky to maintain a speed of ten knots (18.5 kilometers per hour). Most had no refrigerated facilities, so any food sent had to be able to remain edible after periods in excess of two months. A body of women came up with the answer – a biscuit with all the nutritional value possible. The basis was a Scottish recipe using rolled oats. These oats were used extensively in Scotland, especially for a heavy porridge that helped counteract the extremely cold climate.

The ingredients they used were: rolled oats, sugar, plain flour, coconut, butter, golden syrup or treacle, bi-carbonate of soda and boiling water. All these items did not readily spoil. At first the biscuits were called Soldiers’ Biscuits, but after the landing on Gallipoli, they were renamed ANZAC Biscuits.

A point of interest is the lack of eggs to bind the ANZAC biscuit mixture together. Because of the war, many of the poultry farmers had joined the services, thus, eggs were scarce. The binding agent for the biscuits was golden syrup or treacle. Eggs that were sent long distances were coated with a product called ke peg (like Vaseline) then packed in air tight containers filled with sand to cushion the eggs and keep out the air.

As the war drew on, many groups like the CWA (Country Women’s Association), church groups, schools and other women’s organisations devoted a great deal of time to the making of ANZAC biscuits. To ensure that the biscuits remained crisp, they were packed in used tins, such as Billy Tea tins. You can see some of these tins appearing in your supermarket as exact replicas of the ones of earlier years. Look around. The tins were airtight, thus no moisture in the air was able to soak into the biscuits and make them soft. Most people would agree there is nothing worse than a soft biscuit.

During World War 2, with refrigeration in so many Merchant Navy Ships, the biscuits were not made to any great extent. It was now possible to send a greater variety of food, like fruit cake.

ANZAC biscuits are still made today. They can also be purchased from supermarkets and specialty biscuit shops. Around ANZAC Day, these biscuits are also often used by veterans’ organisations to raise funds for the care and welfare of aged war veterans.

Read Full Post »

After yet another Doctor’s appointment (won’t bore you with the details but I did enquire about any ‘frequent flyer’ points……) I was already down in Greenwich this morning and so I thought I would pop into Waterstones to buy Izzy the new Julia Donaldson book. More about that later!

So I parked up and then wandered through the market to pick up some sushi for lunch (I love, love, love sushi!) and the stand in the market prepare it fresh – it’s divine! and then while having a quick look around I came across Mama G and her delicious jams and chillies. I could not help but linger for a tasting and then I needed little convincing to put my hand in my pocket for a jar of the Sweet Kiwi and Honey Apple Jam and a jar of Hot-Hot Mama G Chilli pot (Scotch Bonnet Chillies in a Mango base, along with some other ingredients of course).

I got chatting with Gladys (aka Mama G) who is originally from France and found out that she makes everything in her own kitchen, along with making the labels, doing the marketing etc. A busy operation! So if you are passing through Greenwich Market on a Thursday or Friday call in and see her and pick up a jar or 2!  So much more satisfying to pick up some homemade jam rather than some generic brand in the supermarket.  I love to support local people who are out there giving it a go – it’s a trait I really admire. Plus, no preservatives or additives either. It’s win, win, win!!

Mama G at Greenwich Market

Mama G at Greenwich Market

So eventually I came away from Greenwich with sushi, jam, chilli, a jigsaw puzzle for Izzy, a book for me and the new Julia Donaldson and to be honest that is for me & Izzy. I love Julia Donaldson books, particularly those illustrated by Axel Scheffler.  Julia is most famous for The Gruffalo and it’s a great book but my favourite is Monkey Puzzle. Uncle Doug & Aunty Juls bought this for Izzy when she was born and I have been hooked ever since. The latest book is called Tabby McTat – another imaginative and beautiful book!

Dinner tonight was not really blogworthy – using up potatoes and sweet potatoes by making wedges, along with some left over Chilli con carne that was in the freezer (a Jamie Oliver recipe that I will definitely share at a a later date) and some Cauliflower.

Read Full Post »

Nostalgia is a strange phenomenon – it makes music sound better, memories brighter, foods taste delicious. Think of your favourite song as a 10 year old – if that was released today would you love it as much? Now think of your favourite meal as a 10 year old and would you really truly enjoy it now or would it be the nostalgia rather than your taste buds that made the judgement?

As for me, I loved the 80’s. I had the big poodle perm and was in the throes of the fringe that required a can of hairspray a week to keep it in place (was a killer on my pocket money reserves!!). Yes I had stone wash jeans – Mum & Dad bought them back from the States and had to convince me that Jordache jeans were the best…I was wary as they were not what everyone else was wearing! The same trip also resulted in my prized classic white reeboks – I think these can still be found in certain Essex hotspots! Musically I was an A-HA girl – Morten Harket, swoooonnnn……oh how Wendy & I loved Morten!! We had leather bands half way up our arms – imitation is the sincerest form of flattery!! I remember my first ra-ra skirt (white with black spots, bought on a family holiday in Nelson) teamed with a white tee and a trendy back belt and I also remember the seagull that deposited its waste onto said outfit while we were on our way home on the Picton Ferry. Soooooo many memories………………..and this brings me to Food!

When I was 8 or 9 we moved to Maoribank and our new neighbours were the Pences – Mr & Mrs P, Dena, Cassie & Charlie the Dog. Lots of fun times!! Mr P was an ex American sailor and boy was he fun to be around and the stories he would tell! I don’t think I understood half of them but he always had time for the chatty girl from next door! Mr P was also a great cook and made the American classics – one of them being Sloppy Joes. A dish we had never heard of but which quickly became my childhood favourite. Each birthday brought with it the question ‘What do you want for dinner?’ and the answer was immediate ‘Sloppy Joes’. I loved it! Mum & Dad (who I figured were about the same age as I am now) were not so keen as they would soon be chugging Gaviscon!. Well, heartburn or not, it was my birthday and that’s what ended up on the table!!

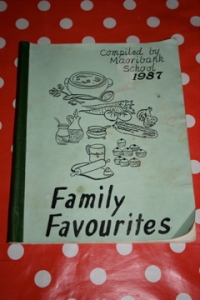
When Mum came over this year I asked if she could dig the recipe out and bring it over. Well she found it in the Maoribank School 1987 Family Favourites cookbook so she bought this over and gave it to me. In case the title did not give it away the cookbook was compiled by the school with recipes contributed by students parents. This may feature more than once (in the name of Nostalgia!) as contains some interesting recipes – true 1980’s style. My Mum contributed Sloppy Joes and microwave Fried Rice (Mum, what were you thinking???). The Microwave Fried Rice will not feature!!!

IMG_5692

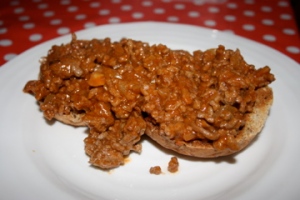
So, tonight I thought it was time to introduce Izzy to the 80’s and Sloppy Joes. Not the most nutritious dinner but I did add some sweet potato and peas to her portion! Well, it tasted exactly how I remember it but now my tastebuds were screaming ‘too sweet, too sweet’ and an hour later I was in dire need of milk to deal with the resulting heartburn (Mother/Father like Daughter!)! James said I made it for him once when we first started seeing each other and he is not a big fan but he still managed to down a considerable portion! Izzy ate hers but with some coaxing. One method I am finding really helpful with Izzy at the moment is when she has only a couple of mouthfuls and says ‘all finished’ I say ‘5 more’ and then countdown and it seems to work more often than not. I don’t mind her not eating parts of her dinner – as long as she tries it each time.

So, here is the recipe (you will see where the sweetness comes from)….

Mr P’s Sloppy Joes

Ingredients:-

1 lb mince

1 chopped onion

2 Tbsp oil (I used a non stick pan so no oil needed)

1 cup (yes cup!) tomato sauce, ketchup or relish

2 Tbsp sugar

2 Tbsp mustard

1 tsp salt

1 Tbsp vinegar

Heat oil in a saucepan (or if using no oil just heat the saucepan) and add the onion and mince. Stir and brown the meat.

Add the tomato sauce, sugar, mustard, salt & vinegar. Simmer gently until meat is tender.

Split hamburger buns in half and toast until brown. Heap meat mixture onto buns and serve.

Now I did use wholemeal buns and lean mince but I guess that is like ordering a diet coke with your super size Big Mac combo!!

IMG_5690

Tastes better than it looks!

Read Full Post »

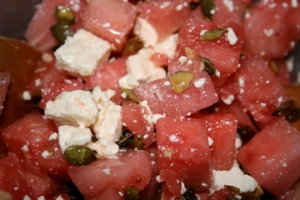
Earlier this year my brother in law Doug married Julia (who as far as I am concerned, has been my sis in law for years!!) and unfortunately for Izzy & I it just wasn’t meant to be so we stayed at home while Daddy went to join the celebrations. I racked my brain as to what we could give D & J as a wedding gift as we wanted it to be special and personal to them. Somewhere in the recesses of my mind I recalled a suggestion of turning a photo book (see http://www.mypublisher.com) into a recipe book which I thought would be perfect for D & J as like us, they also enjoy time in the kitchen. So after emailing all the invitees I received a variety of great recipes and messages! Well a good recipe does not pass through my house/laptop unnoticed and the one that immediately got my attention was the Watermelon Salad which was contributed by Julia’s Aunt. This has quickly become a summer favourite and definitely worth a try – absolutely delicious! and certainly not what you might expect. I love it when you come across a recipe like this!

Watermelon Salad (courtesy of Julia’s Aunt)

Ingredients:-

Watermelon – make it a good one! Small round ones are best. A light tap should indicate the quality and quantity of moisture.

Handful of pumpkin seeds

Feta

Flat leaf parsley

Mint

Extra virgin olive oil

Lemon juice

Freshly ground black pepper

Place watermelon in fridge or chilly bin to cool down – then chop into small chunks. In the meantime lightly brown the pumpkin seeds with a little EVOO in a frypan. Keep tossing them as they can catch. Don’t overdo them!  Place them aside to cool.

Chop the parsely and mint. Cut the feta into small squares.

Now the watermelon and pumpkin seeds should be nice and cool. Place all the ingredients into a large bowl, pour over some EVOO, freshly squeezed lemon juice, freshly ground black pepper and gently mix.

Yum, yum, yum!!!

IMG_5658

IMG_5661

Read Full Post »

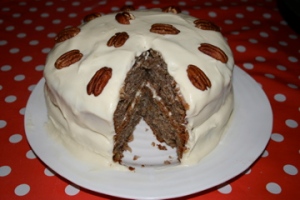
Well, since we had guests for dinner there was the excuse I needed to break out TMBC again! When Isobel M turned 1 Meredith baked a Hummingbird cake and it was delicious so when I saw a Hummingbird cake in TMBC the decision was easily made!

So yummy but then I am a sucker for cream cheese icing. I don’t even want to consider how many calories are in this and I am a little worried about the half a cake that remains…..and that is after dinner, taking over a slice for Sam and sending a slice home with Patricia. I would have James take it to work but as it is Ramadan I don’t think that it is fair on the colleagues who are observing this. As there is a long weekend coming up James reckons he can make a dent in it!

Hummingbird Cake (The Magnolia Bakery Cookbook)

Ingredients:-

3 cups flour

1 tsp cinnamon

1 tsp baking soda

1 tsp salt

1 1/4 cups vegetable oil

2 cups sugar

3 large eggs, at room temperature

1 1/2 tsp vanilla etract

2 cups mashed, very ripe bananas

1 8oz can crushed pineapple, in unsweetened juice, drained (about 1 cup)

1/2 cup chopped pecans

Preheat oven to 160C.

Grease and lightly flour two 9 x 2-inch round cake pans, then line the bottoms with waxed paper.

In a large bowl, sift together the flour, the cinnamon, the baking soda, and the salt. Set aside.

In a large bowl, on the medium speed of an electric mixer, beat the oil with sugar until smooth, about 3 mins. Add the eggs one at a time and beat until light, about 1 or 2 mins. Add the vanilla extract. Add the bananas and the pineapple. Add the dry ingredients in thirds, beating after each addition until smooth. Stir in the pecans. Divide the batter between the prepared pans and bake for 40-50 mins or until a cake tester inserted into the centre of the cake comes out clean. Let cakes cool in pans for 10 minutes. Remove from pans and cool completely on wire rack.

When cake has cooled, ice between the layers, then ice top and sides of cake with cream cheese icing. Garnish with pecans if desired.

Cream cheese icing

Ingredients:-

1 pound cream cheese, softened slightly, cut into small pieces

1/2 cup unsalted butter, softened slightly, cut into small pieces

1 1/2 teaspoons vanilla extract

5 cups sifted icing sugar

In a medium-size bowl, on the medium speed of an electric mixer, beat the cream cheese and the butter until smooth, about 3 minutes. Add the vanilla extract. Gradually add the sugar and beat until well incorporated.

The recipe says it makes enough to ice this cake but I still have a lot left in the fridge. Not sure if I will use it – maybe e a carrot cake for the girls at nursery.

IMG_5683

Read Full Post »
This evening Izzy had yet another dinner date, this time with the gorgeous Joshua! Joshua and his Mum Patricia joined us for a quick dinner after nursery. Has to be pretty quick as if you miss that bed time slot on week day evenings there is hell to pay!

At the moment Izzy is not overly keen on her veges, especially green ones (the exception is broccoli and peas) so we need to be a little inventive at times so that we don’t just rotate the same vegetables. A great recipe for this (it’s also tasty, which is a plus) comes from Tana Ramsay in the form of Red pepper and Apple Meatballs with sweet and sour sauce. I thought I would double the recipe in order to freeze some and now I have meatballs to last the next decade – it is a recipe of generous proportions.

Izzy really enjoys this dinner – can’t go wrong with this recipe as she is such a carnivore (must be the Kiwi in her!).

Red pepper and apple meatballs with sweet and sour sauce (courtesy of Tana Ramsay – Family Kitchen)

The meatballs are best made the night before and left in the fridge till tea time. This helps them not to fall apart while cooking.

Ingredients:

For the meatballs

450g lean lamb mince

450g lean pork mince

1 red pepper, deseeded and finely chopped

1 small onion, finely chopped

3 Cox’s apples, peeled and finely grated

1 Tbsp grated ginger

4 tsp chopped coriander

1 egg white

flour

2 tsp olive oil

For the sauce

2 tsp olive oil

1 red onion, finely chopped

4 baby leeks, chopped

1 courgette, sliced

450g cherry tomatoes, halved

salt & pepper, to season

2 tsp brown sugar (to taste)

2 tsp malt vinegar (to taste)

6 fresh basil leaves, torn (oops, forgot this!)

Place the pork & lamb mince into a large mixing bowl, and break it up a little. Add the finely chopped red pepper and onion, and then the grated apples, ginger & coriander. Add the egg white and mix all together.

Shape the mixture into small ball, approx 2cm in diameter, and place on a tray lightly dusted with flour then place the tray in the fridge.

Meanwhile, in a medium frying pan heat up the olive oil and gently fry the onion until softened. Add the leeks and the courgettes and let them slightly colour, then add the halved tomatoes and let it all soften together. Check he seasoning, and add the the brown sugar and malt vinegar. Let the sauce simmer gently.

After approx 20 mins place the sauce into a liquidizer and whizz until smooth. Place back into the saucepan and leave aside.

Heat up 2 tsp of olive oil for the meatballs – best to use a deep fry pan (you may need 2). Get the tray of meatballs out of the fridge and when the oil is nice and hot , place the meatballs in oer a moderate heat, turning to ensure they are cooking evenly.

IMG_5680

After about 10 mins ladle in the tomato sauce and allow this to heat thoroughly, until it is bubbling gently with the meatballs. Leave this to simmer for 15 mins.

Drain, and serve with rice. Garnish with basil.

Izzy and Joshua - so sweet!

Izzy and Joshua - so sweet!

Read Full Post »
I need to go back to work!! or we are all going to be putting on huge amounts of weight!! Still healing, still in the kitchen!

The Magnolia Bakery has become a must visit when in NYC – not that I have been but boy, would I like to! It’s (apparently) the home of all things scrummy and delicious. I found on Amazon The Magnolia Bakery Cookbook (only problem is all measurements are American – mainly cups, some lbs & oz, sticks of butter (which are 113g according to Google) etc) and so I have been keen to try out a few of the recipes and see if they live up to the hype.

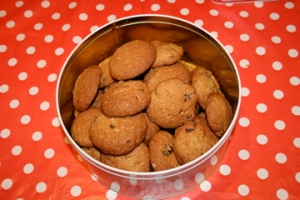
First up, that American classic…….COOKIES! I have found cookie (or biscuits. Depending on where you reside!) recipes to be a bit hit and miss. Many of mine have turned out too flat or too crunchy (overcooked perhaps?). After flicking through TMBC I found Oatmeal Raisin Almond Cookies – perfect! I love the combination of oat and raisin – it’s the best! The recipe makes 3 dozen cookies – so plenty for kids, coffee mornings and the nightly cup of tea. However in this instance Izzy was not overly keen but no complaints from James or I. Since I made them I have been giving them away in plastic baggies to friends and the neighbour. Our neighbour is Sam and he has been bombarded with baked goods over the last month – I always pop him over a slice of whatever is fresh out of the pven. Sam is a keen gardener and so we have been rewarded in turn with the sweetest, most delicious tomatoes. Anyway, back to the cookies…

Oatmeal Raisin Almond Cookies (courtesy of The Magnolia Bakery Cookbook)

Ingredients:-

2 1/2 cups flour
3/4 tsp baking soda

1/2 tsp salt

1 cup (2 sticks) unsalted butter, softened

1 1/2 cups firmly packed light brown sugar

2 large eggs, at room temperature

1 tsp vanilla extract

1/2 tsp almond extract

1 1/4 cups rolled oats

1 1/2 cups raisins

1/2 cup finely chopped toasted almonds (toast in oven for 10-15 mins at 160C, or until lightly brown and fragrant)

Preheat oven to 180C.

In a large bowl, sift together the flour, the baking soda, and the salt. Set aside.

In a large bowl, cream the butter and the sugar until smooth, about 3 minutes. Add the eggs, the vanilla extract, the almond extract and mix well. Add the oats and flour mixture and beat thoroughly. Mix in the raisins and almonds. Chill the mixture for 30 mins in the fridge before proceeding. Drop by rounds teaspoonfuls onto ungreased cookie sheets, leaving several inches between for expansion. Bake for 15-18 mins or until lightly golden brown.

Cool the cookies on the sheets for 1 minute, then remove to a rack to cool completely.

IMG_5666

Read Full Post »

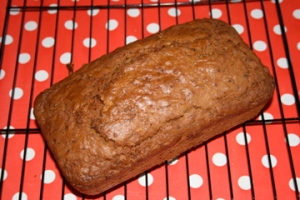
While we were in Scotland Robert & Laura recommended this recipe and kindly provided us with a copy. So this morning James took Izzy off to the park for a scoot with her pals Harry & Jack and I enjoyed the peace of an empty house on a Sunday morning – well that was until a neighbour’s house alarm went off (and continued to do so on and off all day longl!). Anyway what to do in the peace? Bake! Time to try out Robert & Laura’s recipe! It has come out of a newspaper and according to the article was contributed by the makers of Billington’s refined sugar (aha! a sales ploy!). Well, whoever devised this recipe deserves a pat on the back – bravo!!

Courgette Loaf Cake

Ingredients:-

3 large eggs

400g light muscovado sugar (Billington’s of course!!)

200ml vegetable oil

500g courgettes, unpeeled and grated

700g self-raising flour

1 tsp salt

1 tsp baking soda

3 tsp ground cinamon

75g pecan nuts, chopped

This recipe makes 2 loaves.

Preheat the oven to 180C and grease two 1kg loaf tins. In a large bowl, whisk the eggs until pale in colour and light in texture. Add the oil, courgette and beat until all the ingredients are well mixed. Sift the dry ingredients, add pecan nuts and fold into the egg mixture. Spoon the mixture into the loaf tins and bake for about 1 hour, or until firm to the touch and a skewer inserted into the cake comes out clean. Turn out on to a wire rack and leave to cool. Serve with butter or a cream cheese icing.

IMG_5640

Read Full Post »

Older Posts »